Leaderboard


Popular Content
Showing content with the highest reputation since 03/04/2020 in Articles
-
Painting Outdoors on a Full Pallet Field Day by Margaret Stanton An artist, inspired to paint the Gothic and Florentine architecture outdoors in Prague, must choose between an almost limitless range of subtle colors to use. In this medieval city, there are cooler hued buildings of stone with grayed lavenders, greens and blue browns. There are also warmer toned surfaces with ochre, yellows and oranges. Add to this an eclectic, no-rules range of color on many of the building's newly renovated surfaces, and you have a genuine, full palate field day! An artist needs to decide how to achieve color harmony in the shapes and nuances depicting these historic treasures if their next best painting is going to be a success. Rod Cameron reveals the secrets behind his choices of color in the painting titled, "St. Michelos Cathedral - Prague". Notice how he breaks down color into groups of "warm" and "cool". He tells students, "I saw the two towers in the sun as "warmer" mixtures: the thinner, taller steeple a mixture of cerulean blue and burnt sienna with white, and the main domed building a mixture of yellow ochre and burnt sienna with white." Using these warm hues as a reference point, Cameron uses a split complementary, which indicated blues, lavenders with touches of viridian green for the shadows and in the street buildings on either side. These cooler shadow colors frame the scene and provide exact compliments to the warm Hues of the Cathedral in the sunlight. To further enhance the warm atmosphere in the sunny part of this painting, the artist mixed cerulean blue into the sky. Cerulean blue, being the "warmer blue", supported the warm, sunny part of the composition and harmonized with the cerulean mixtures in the architecture. To see how easy it is to find and select complementary, split complementary and other color combinations, Rod Cameron suggests to artists to make or get a hold of a simple color wheel, found at any art supplier, and just dial up a color. In the case of Rod Cameron's painting of St. Michelos in Prague, he pointed to orange on the color wheel as his initial reference point, for the sunny surfaces of the Cathedral. The compliment of orange is ultramarine blue, but Cameron chooses the split complimentary; the colors that you find on either side of blue. The color wheel beautifully illustrates, lavenders on one side, and blues with a touch of viridian green on the other side; the split complimentary colors that Rod Cameron uses in the painting. Touches of your warm mixtures in your cool colors, and visa versa, will slightly gray things down, and go further to create great color harmony in your painting. The use of split complementary colors adds a greater range of color and more variety in your painting without sacrificing harmony. Color wheels are inexpensive and give the artist a better understanding of the color families and how they relate to each other. Even after you've memorized all the color combinations, it still fun to refer to now and then, plus, the wheel just looks cool hanging on the wall. Every studio should have one!3 points
-
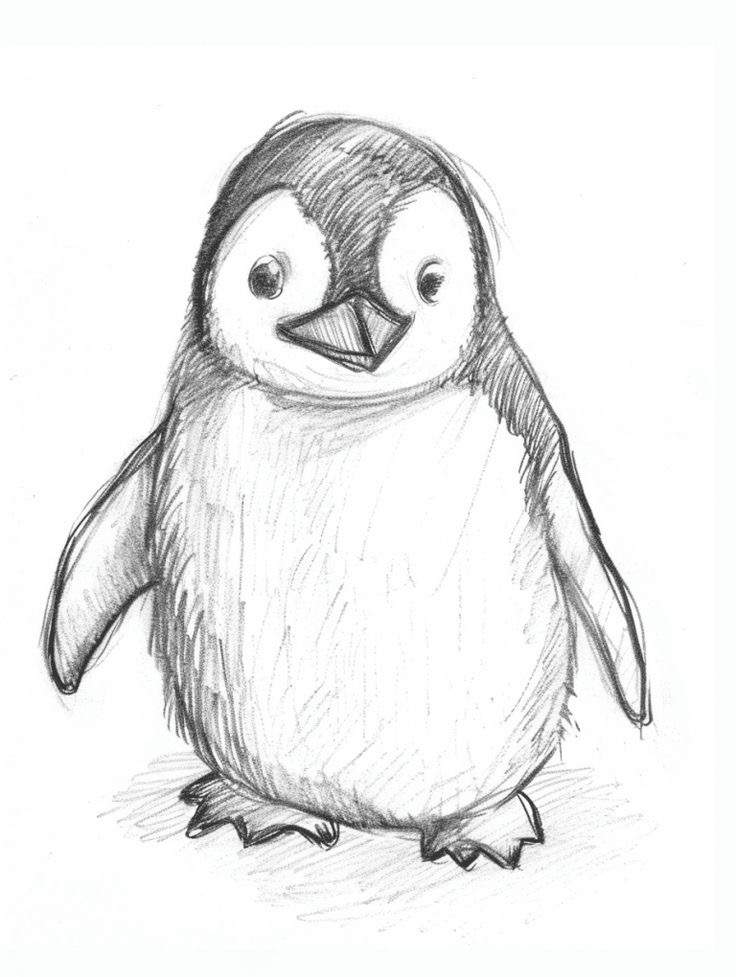 This artwork focuses on the penguin as a symbol of resilience and adaptability. Depicted in its natural habitat, the penguin embodies the beauty of survival in harsh environments. The contrasting colors of its sleek black and white feathers against the icy landscape emphasize its uniqueness. Through this piece, I aim to evoke feelings of warmth and wonder, inviting viewers to appreciate not only the penguin’s charm but also the larger themes of community and perseverance in the face of challenges.2 points
 -
First attempts at drawing... How to get started. The drawing upside-down and the white space tips both came from of Betty Edwards, in her book: The New Drawing on the Right Side of the Brain And here is a link to her website, purely by way of a big thank you! https://www.drawright.com/ OK, so you have finally plucked-up the courage to get that sketch pad out that you were given for your 8th birthday - (you are now 28!) - and you really want to have a go at drawing. A good place to start is just copying a photograph of anything that takes your fancy. Ideally, you want to work from a printed photograph or a cut-out from a magazine - or even a comic, if that is what you are into. Now, first things first... TURN YOUR PHOTO OR PRINT-OUT UPSIDE-DOWN! If you are working from your laptop, rotate the image through 180 degrees. Now. If you are trying to copy a photo of a person, don't even attempt to draw the person. Draw the "white space" around them. So, if for example, they are standing against a door, then draw the door and the edges of the bits of the door that you can't see because of the person who is standing in front of it. What you end-up with is, of course, the outline of a person. But the important thing is that what you have been drawing is the door - not the person. It's exactly the same procedure if it is just the head part. Instead of trying to draw the head, you draw everything around the head. So everything EXCEPT the head. What is left in the middle will actually be the outline of the head - but that is not what you are looking at when you draw it. Same thing if it's the arms, hands, body, whatever. You DON'T draw the hand. You draw the space around it. So, if the guy is resting his hand on a table, you draw the table - not the hand. Then the bit of the table that is missing is, of course, where his hand is resting. 'Same thing if it is a cow in a field. A kettle on a stove. A car. A horse and cart. Whatever. You name it!! When you come to draw in the details, keep the photo that you are copying upside-down and just draw what you see - in the correct location, relative to the outline. So DO NOT try to draw a face. DO NOT try to draw a hand. Turn the photo upside-down!! Draw in the "white space" first. Fill-in the details as you see them. Erase from your mind any conception of what you think a hand, face, head, someone's neck, a horse or a dog should look like. And just draw what you see!! It may take a few attempts but you will very soon get used to drawing exactly what you see - not what you think you are seeing. Or what you think a hand or a face should look like. As soon as you are confident in your ability to just draw what you see - how it actually is - not how you think it should be - you can then work with all of your photos the right way up. And please DON'T practice to much. All that will do is to spoil your creativity and all your stuff will look very boring and technical. Just get on with it and enjoy the process. Once you get going - if you just let yourself go - you will very soon develop your own style. Your drawings DON'T have to be perfect. They just have to be natural and you have to have fun doing them... You don't have to spend hours and hours of drudgery practicing to try and make your drawings look like something out of a text book. Let your own style develop by itself. Last one... If ever you want to try your hand at drawing a live model - obviously, you can't turn them upside-down!! What you have to do is to draw all the "white space" around them first. Get the basic outline of their body. Then fill in the details exactly as you see them. When it comes to eyes - and, especially hands - you really need to just draw what you see. Don't think of these things as eyes or hands. Just think of them as random lines that you have to copy. I really can't understand why so many beginners have so much trouble drawing hands!! They almost always seem to draw them about half the size they should be. If you are having trouble with hands, don't try to draw hands. Just draw the white space around them. It's that easy!! Just give it a go! Don't practice. And have fun! Then upload your results here at artfreaks.com. Don't be ashamed. This site was specifically designed for beginners and amateurs. We used to have loads of beginners when the site first started, back in 2005 and it would be lovely to see some more absolute beginners back on the site!2 points
-
OK, here's the tip: When you have learned a few words of the Thai language and you want to start trying them out on a Thai-speaking person, please don't get upset when they look at you all blank and they obviously haven't understood a word that you have said... Or, more likely, they are completely and utterly confused by what you actually did just say! You just need to work on those tones... For anyone literally just starting out with learning Thai - the sooner you can get your head around the fact that Thai, (like Mandarin and other Chinese languages,) is a tonal language - the better! The Thai language uses five different tones. Each syllable in any one word has one of the following tones: Lòw, mid, hígh, fȃlling and rǐsing Note the tone marks above. These are the most commonly used ones that you will come across when looking at Thai words that have been transliterated into the Roman alphabet - mostly in the 'Learn Thai in Five Minutes' type of textbooks. These tone marks are easy enough to produce in a Microsoft Word document but other than copying and pasting from Word, I haven't figured out how to insert them here on my own website! So I will use the following colour-coding to indicate the tones, for the purpose of this article: Low, mid, high, falling and rising This is based on a "traffic light" system. (The red is usually on top and the green is at the bottom of the three lights. Pink is "falling" from red - and light green is "rising from green - if that makes any sense?!!) Now you know why the Thai alphabet contains about three times as many letters as the Roman alphabet! In very simple terms, it is one of the ways that the different tones are indicated. The extended alphabet, in conjunction with some tone marks, (in some words but, by no means all) - and some rather complicated "tone rules" enables any Thai language script to be read phonetically, including the tones. The important thing to realize here is that if you transliterate any single syllable Thai word into the Roman alphabet, then that same group of letters can have up to five different and totally unrelated meanings when spoken back to a Thai person - depending on which tone you use... For words of more than one syllable, the problem does not go away! So it is best to: a) Take note of the tone marks, if you are reading a "Learn Thai in Five Minutes" type of text book. b) Whenever you learn a new word, make sure that you learn it together with the correct tone. Otherwise you could end up in an embarrassing situation! (More on this, later...) c) If you decide to make a list of new (transliterated into the roman alphabet) words - or better still, your own flashcards - you will need to indicate the tone, somehow. If you don't like the commonly used tone marks for transliterated Roman alphabet text, you can use your own colour-scheme or, for example, underline low-tone syllables, put a line above high-tone syllables - and a sweeping downwards curve for falling tones with an upward sweeping curve for rising tones. Just use whatever works for you. But indicate the tones and learn the correct tones together with the pronunciation of any new word that you come across. Here's why: Khun suay - all mid tones - ( คุณซวย ) - can be translated as: "You are unlucky, unfortunate - or even bad!" You probably meant to say: Khun suay - rising tone on the second syllable of the second word - ( คุณสวย ) - which means "You are beautiful!" Some more: Mai wai - falling then rising tone - ( ไม่ไหว ) - Unable to... cannot... Mai wai - rising then high tone - ( หมายไว้ ) - To expect, anticipate, predict Mai wai - falling then mid tone - ( ไม่วาย ) - Always, constantly, to keep on repeating or doing the same thing Enough said? So the different tones don't just change a word slightly - to mean something similar. There are absolutely no similarities in meaning between any of the above examples. They are completely different words and it's no wonder that a Thai person cannot understand you if you don't at least try to pay attention to the tones of each and every syllable that you speak. It sounds quite daunting but, really, it isn't - just as long as you learn the correct tones for each new word, every time you come across one. Your Thai friends will definitely help you with this... Pay attention!!!2 points
-
On my Thai vocabulary flashcards, I write the Thai words using a colour-coding system to indicate the correct tone to use for each syllable: Red for High Tone syllables Plain black for the Mid Tone syllables Green for the Low Tone syllables Light Green for rising tones. The tone is rising up from a low (dark green) tone, hence the light green? It made sense to me! and Pink for falling tones. The tone is falling from a high pitch, hence the colour should be a bit "less" than pure red?! For the transliterated Thai to Roman Alphabet script, (which tells me how to pronounce the words,) I use the fairly standard: (Please note: This works in Microsoft Word documents but it won't work with this website - not unless you write your post or article in MS Word and then copy and paste the text over to here...) High Tones - A Combining Acute Accent (something like an "/" on top of the syllable) by typing 0301 after the letter over which I want the accent to appear; highlighting this - and then clicking on Alt + x Low Tones - A Combining Grave Accent (as above but sloping down from left to right) by typing 0300 after the letter over which I want the accent to appear; highlighting this - and then clicking on Alt + x Falling Tones - A Combining Circumflex Accent (like a little ^ on top of the syllable) by typing 0311 after the letter over which I want the accent to appear; highlighting this - and then clicking on Alt + x Rising Tones - A Combining Caron (as above but the other way up) by typing 030C after the letter over which I want the accent to appear; highlighting this - and then clicking on Alt + x It took me a while to figure out just how to do that, so I just wanted to share, as they say. (Well, if nothing else, it will provide me with a reference as to how to do it, in case I forget the codes...) The above works fine with StudyMinder Flash Cards1 point
-
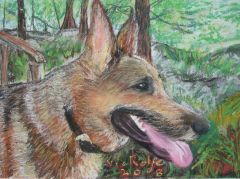
This tip was the number one lesson that I learned from The New Drawing on the Right Side of the Brain by Betty Edwards If you want to make a drawing from a photograph, just turn the photo upside-down and then copy exactly what you see. Try it. This sounds really stupid but it actually works! The idea here is to confuse the left (rational) side of your brain and prevent it from taking-over your drawing process and making you draw things as the symbols that it sees in. If you leave the drawing or photograph the right way up, the left side of your brain will dive in there and say "Ah! An eye! I know what an eye looks like...!" and then you end up drawing an eye or a face or whatever as you think it should look - rather than the way that it actually looks... There is really nothing very difficult about drawing. Almost anyone with a functioning hand and reasonable eyesight, fingers, paper and a pencil can do it! No special fingers are needed - ordinary ones will do just fine!!!!! And the only skill you need to master is the ability to condition your mind into drawing what is there and not the symbols that the left side of your brain rationalizes in. Just go ahead and give it a try... You'll be amazed at the results! Once you have done this a few times and you start to build your confidence, you'll find that you are able to just copy exactly what you see - (rather than what the left side of your brain thinks you are seeing.) Once you have conditioned yourself in this way, you will find that you no longer need to turn your subject upside down... Ha ha! The drawing on the right-hand side of the below, shows the results of my first attempt at upside-down drawing...1 point
-
I have had countless problems with pastel fixatives and I have totally ruined many a good painting by using too much of the stuff. The first solution here is to use as little as you can get away with. Even the absolute best quality fixatives will tend to have a slight dulling effect on the colours and, if you use too much, you will make the surface "frosted" - or even shiny. (And it's quite difficult to apply pastels to a shiny surface!) I want the fixative to bind the pastel particles sufficiently to be able to add a subsequent layer - and nothing more. For this reason, I never use fixative on the final layer... This helps to maintain the vibrancy of the final layer of pastel on the painting. If you choose to follow this method, just be very careful with the painting until you can get it framed behind glass... Building up a pastel painting with several layers - as long as you don't overdo the fixatives - can actually make the painting more vibrant. Unfortunately, though, it's quite hard to build your layers if you are not fixing between the layers... My advice here is to simply go for the very highest quality product that you can lay your hands on... For one thing, the price of a very high-quality pastel fixative will put you off using too much of it!! And you will stand much less chance of getting any very undesirable "frosting" effects if you do accidentally use too much. My fixative of choice is the one made for pastels by Senellier. (Senellier also do a very similar fixative which has been formulated especially for charcoal drawings. I find that it also works very well with pastels but it does seem to be a bit lighter - and so you really need to use more of it when working with pastels...) I can not get hold of Senellier fixative in the Philippines but I find that the museum grade varnish, satin, produced by "Golden" suits my purposes quite well. The only real problem that I have with the Golden varnish is that it takes quite a while to dry. But then again, that usually gives me a good excuse to go out for a beer! I buy my Golden varnish at Diovir in Santa Cruz, Manila I wouldn't touch any of the other so-called fixatives that you can buy in National Bookstore, with a bargepole!!1 point
-
I already have a topic in the Forums on the subject of some good photography book recommendations, so I am not going to duplicate what I have already written there. Of course, the best way to start taking great photos is to get out there with your camera and start shooting! However, most of us can also use a bit of a grounding in the basics - or even some of the more advanced techniques. And there is nothing like a good book on a cold, wet and windy day, now, is there?! If any member would like to share the details of any great photography books that they have come across, they are encouraged to do so here - either by way of a reply to this article or by publishing a new article of their own. Members can also, of course, start a new topic in the artfreaks.com forums, if they prefer: https://www.artfreaks.com/forums/forum/9-photography/ More input from the members of this community site for artists and photographers will always be appreciated! Thank you!1 point
-
If the painting has been framed behind glass, then the first thing that you need to do is to remove it from the frame. Obviously, it is better to photograph your pastel painting before you have it framed in the first place, if you can! Mount the painting taught and flat on a stiff board - secured with some masking tape around the edges. Site your painting in good, well-diffused light - preferably natural sunlight - in order to bring out the best of the colors. If you have a tripod, set your painting-up so that it is perfectly perpendicular to the camera. If you don't have a tripod, just site the painting in such a position that you can hold the camera perpendicular (or 'square-on') to it without straining yourself! This is very important. You need the camera to be 'square-on' to the painting - otherwise, your image will be distorted. With or without a tripod, your camera also needs to be pointing at the center of the painting and not located off to one side. So, perpendicular to the the surface of the painting and located so that it is pointing at the center of the thing! If you have a tripod, or if you can borrow one, it will allow you to use a longer exposure, without getting any camera shake. This, in turn, will mean that you will be working with a smaller aperture - thus helping to keep the whole painting well focused. You can even get away with photographing the painting behind glass if you use a polarizing filter but, you will always get a better photo if the painting is not framed behind glass. Oh... And don't forget to crop your photo so that it shows only the painting itself... We don't really need to see half of your furniture or the color of your wallpaper!!1 point
-
My first choice for a pastel paper would have to be any decent, heavy-duty hand-made watercolor paper... Strong and rough with nice jagged edges!! India produces some really excellent papers of this type and they are well-worth looking out for the next time you visit a professional artist's store. A very close second and, in some ways, also my first choice is Waterford Watercolor, Rough After that; anything with plenty of 'tooth' to hold the pastels - and strong enough to withstand some scraping and a lot of water and fixatives. (Rather than buying pre-coloured pastel papers, I tend to make a watercolor wash using pastels and a wet paint brush to create my initial background colors, layout and color scheme... after that, I always go over the top with fixatives - except in the final layer where I never use them.) Canson Me Tientes pastel papers are readily available in the Philippines, where I live - but I find that they are not really strong enough to withstand the kind of rough-handling that my style of painting demands. However, because they come in a wide variety of colors, they are great for when I want to really force myself to go easy on the application of pastel and to try and keep to a more traditional style of pastel painting with at least a bit of the original paper color showing through.1 point
-
 It is a waste of time (and expensive art materials,) in trying to force yourself to paint when you are not in the mood. Here's a few personal tips on getting oneself motivated and finding the time to do some art: 1. Have a source of income other than art, so that you can paint when you feel like it - not just when you need money for food, rent and beer! 2. Have a bit of space, (a spare room, well-lit garage - or even just a corner of the living room if you are not lucky enough to have your own studio,) where you can leave all of your gear out. That way, when the mood strikes, you will not have the bother of getting all your art materials and accoutrements out before you can even start. This is a great way of maximizing your precious painting time... 3. Unplug the computer! 4. Unplug the TV 5. Put on some nice music. 6. Take the dogs for a walk first. Get them tired-out - and then you can concentrate on your art! 7. Open a can of cold beer or a bottle of nice red wine. 8. Get some painting done before you fall asleep!1 point
 -
It took years for me to learn some very basic stuff about photographing my art. Today's point and shoots digital camera's are so much better, but be careful, there are some very special features that you really have got to have in order to shoot oil paintings. One feature that will allow you to get about 95% glare out of the print! Using a CPL filter, circular polarizing lens. More info here on how to get the lens for your camera, or at least what to look for on the camera to see if you can even add it! What features to look for in a digital camera and more info on actually shooting the work. Shooting your own work the easy way!1 point
-
It's probably a good idea to at least get some confidence in drawing before you try to start painting. The great news is that, as proved by 'Yours Truly', anyone can draw!! I didn't actually realize this until I read The New Drawing on the Right Side of the Brain by Betty Edwards. If you can get hold of a copy and work through the book, I can virtually guarantee that it will give you the confidence to get you started - and you'll be amazed at your own results!1 point
-
This tip is from Jennifer Blenkinsopp at ArtWanted.com:1 point
-
This tip is from Jennifer Blenkinsopp at ArtWanted.com:1 point
-
This tip is from Jennifer Blenkinsopp at ArtWanted.com:1 point
-
1 point
-
This is another really useful trick that I learned from The New Drawing on the Right Side of the Brain by Betty Edwards Tip: Instead of drawing, for example, a man's arm with his hand resting on his hip - look at the space between his arm and his body. Do not look at his arm and do not look at his body. Look only at the space in between his arm and his body... Then draw draw that space! The same thing applies to drawing the outside edge of the man's arm... Look at the nearest object to his arm and draw the space between that object and the man's arm! That way, you overcome the tendency of the left-side of your brain to make you draw things in the simplified symbol images with which that part of your brain rationalizes the world around you. Then, having overcome this annoying tendency of the left-side of your brain to continually butt-in and interfere with your art - (which is, essentially, a job for the right-side of the brain) - you end up easily being able to draw what is actually there - rather than what the left-side of your brain would very much like you to draw...!!1 point
-
Hello, I am new to this site. I am an amateur digital artist, I have not sold any prints of my works yet. I just started putting my prints up for sale on fine art America in May of this year. So far I have used Twitter, Redgage and Stumble Upon to market my works. If you have any marketing tips I would love to hear them. In addition, if you have any feedback on my work from the sites above please let me know. Feedback whether negative or positive is highly cherished.1 point
-
Although Rembrandts are generally classed as soft pastels - I'd put them at the very hard end of "soft." However, when you look at the extremely high standard of Jennifer Blenkinsopp's work, you can tell that they obviously work for her! Personally, I much prefer Schmingke and Senellier soft pastels. These are in a different class of softness - a bit like comparing glass with butter!!! I can't find either Schmingke of Senellier pastels in the Philippines, so I buy them every chance I get when I am abroad. Otherwise, I order these very soft pastels online from MisterArt.com - and have them delivered by FedEx. (Mister Art's prices are very reasonable but I find that I get stung by the customs on delivery...)1 point
-
This tip is from Jennifer Blenkinsopp at ArtWanted.com:1 point
-
The following tip is from Belgian artist, Pol Ledant:1 point
-
In an early morning painting on the famous Charles Bridge in Prague, Czech Republic, the shadows are made up of warm colors. Artist, Rod Cameron, offers this insight into the color temperature that he used in the painting, and gives artists a good rule of thumb when selecting colors for shadows. At sunrise and sunset, the color of the light is changing very quickly. For even very ambitious plein air painters who manage to set up their easels at the crack of dawn, it's nearly impossible to finish the painting and capture the lighting effects on the landscape before it changes. And it's hard to remember exactly how it looked when you got the inspiration for your creation. Rod Cameron, travels with other artists all the way from his home on the Big Island in Hawaii to central Europe and the Czech and Slovak Republics, to paint in Prague. Knowing how to handle the shadows in certain colored light can be very helpful when painting en plein air, and the time and the light is moving too fast. Rod Cameron tells his students, "The magical light of Prague this early in the morning had a cool predominate cast, which brings the shadows to the warmer hues of the palate. Cool light equals warm shadows, or warm light gives cool shadows. This is the general rule." Even experienced plein air painting artists can benefit from this little reminder, especially when it's early, and you're in the moment. You want to capture the look and feel of cool, early morning, before the sun is up, and a few good rules of thumb can help take the guesswork out! "The incredible buildings of the city create an interesting sky line across the horizon and I used the tall statue on the left, which had a natural gaze into the scene and the focal points of the painting," said Rod Cameron while describing his painting titled, Charles Bridge. This Rod Cameron painting of the Charles bridge in Prague can be found on the web. Go ahead! Travel halfway around the world. Get up at the crack of dawn, and capture in your paintings the beautiful places that you travel to with confidence! The light may be changing too quickly, but the architecture, skylines and statues aren't. Create great value and color harmony with complimentary colors, then nudge the color in the shadows either warm or cool. Notice that it gives your shadows a "real presence" . Painting Tip, Plein Air Painting in Europe, Expert advise on Painting, Painting Shadows, Painting workshop, Rod Cameron Art,1 point